If you like vegan yogurt but don’t want to spend your money on expensive store-bought plant-based yogurt, I got the perfect solution for you. This vegan yogurt with coconut milk is insanely easy to make. And it’s super delicious and very budget-friendly!
Why This Recipe Works
I’ve been making this coconut yogurt so many times and it’s always a hit! Please note that you need an Instant Pot with a yogurt function to make this recipe.
The recipe is super easy, budget-friendly, and it requires only minimal active hands-on preparation time.
Just remember that while you don’t have to do much, the yogurt takes quite a while to be ready to eat. In total, you need 2 full days. First 24 hours in the Instant Pot and then at least another 24 hours in the fridge.
I had problems finding a vegan yogurt starter in Canada. They all contained skim milk powder. I know that vegan yogurt starters exist, but they aren’t easy to find. So I looked for an easier version that everyone can make.
I ended up using probiotic capsules for my vegan coconut yogurt, which worked really well. Using probiotics can also be much cheaper than using a vegan yogurt starter.
The canned coconut milk makes the yogurt super creamy while the agar agar ensures that it will set up nicely.
What Goes Into This Recipe
The best thing is that you need only three ingredients for this recipe:
- Coconut Milk – use full-fat coconut milk. Don’t replace it with light coconut milk as the yogurt will become too thin when using a light version.
- Vegan Probiotic Capsules – they should have a total of 50 billion active cells. You can either check your local drug store or pharmacy for vegan probiotic capsules or order them online.
- Agar Agar – it’s a vegetarian substitute for gelatin. You need agar agar powder for this recipe. It’s also available as flakes.
How To Make This Recipe
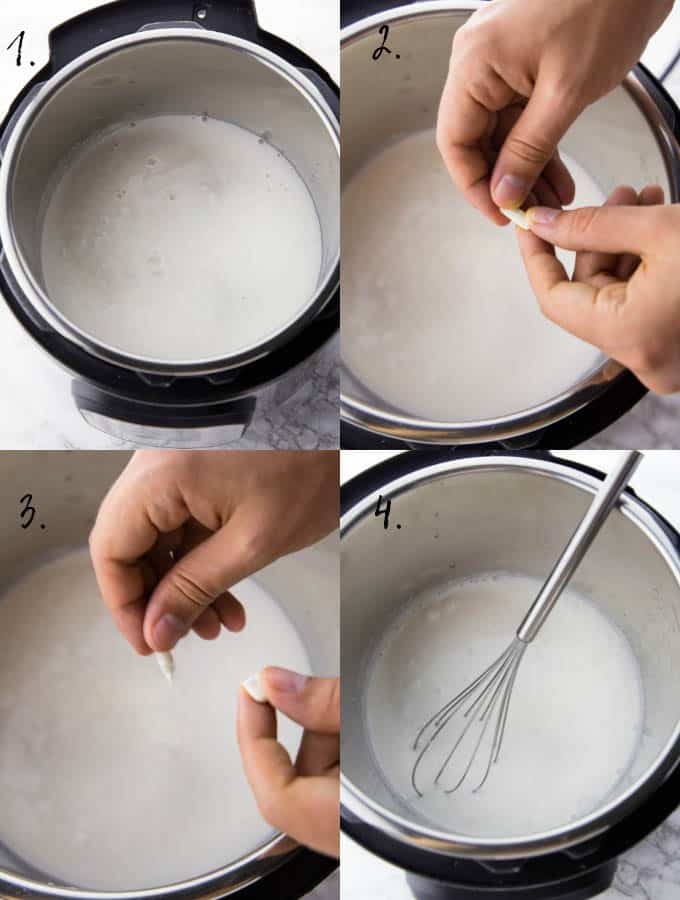
1. Step: Pour two cans of full fat canned coconut milk into your Instant Pot. Make sure to use an Instant Pot with a yogurt function. I used the Instant Pot Duo 6 Quart for my coconut yogurt.
2. Step: Carefully open a vegan probiotic capsule and pour its content into the Instant Pot. You should have a total of 50 billion active cells. If you have probiotic capsules with less active cells, just use several capsules to reach 50 billion. Only add the content of the capsule to the coconut milk, not the whole capsule. Also add the agar agar at this point.
3. Step: Stir with a whisk or spoon until well combined.
4. Step: Press the “Yogurt” button on your Instant Pot and set it to 24 hours using the “+” and “-” buttons. Then let the Instant Pot do its thing.
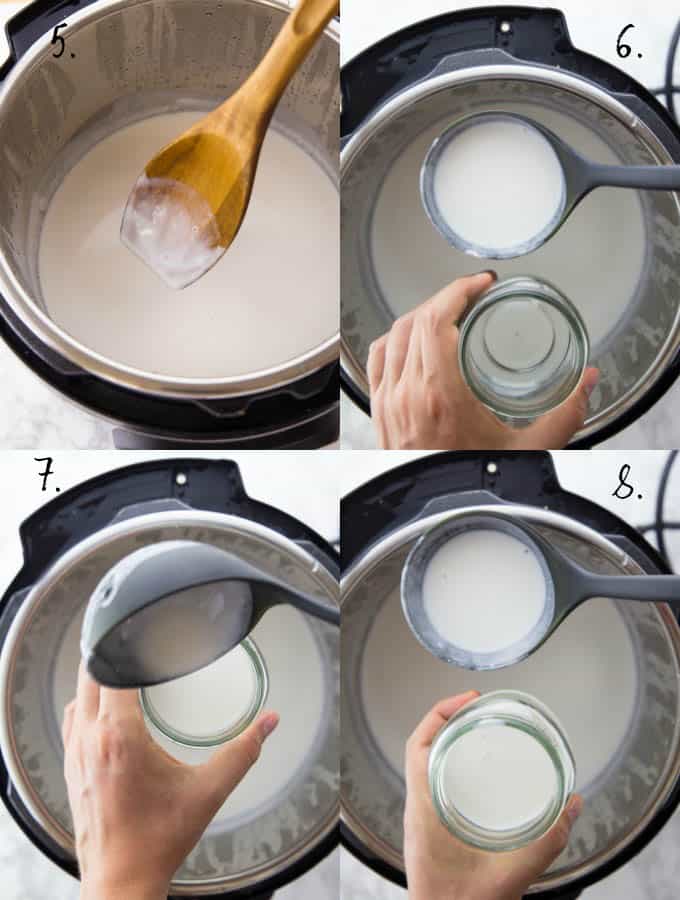
5. Step: After 24 hours open the Instant Pot. Please note that the yogurt will still be pretty thin and runny. Don’t worry, that’s normal. It will get considerably thicker when it’s cooled down for at least another 24 hours in the fridge.
6. Step: After opening the lid, transfer the coconut yogurt into small glass jars or plastic containers.
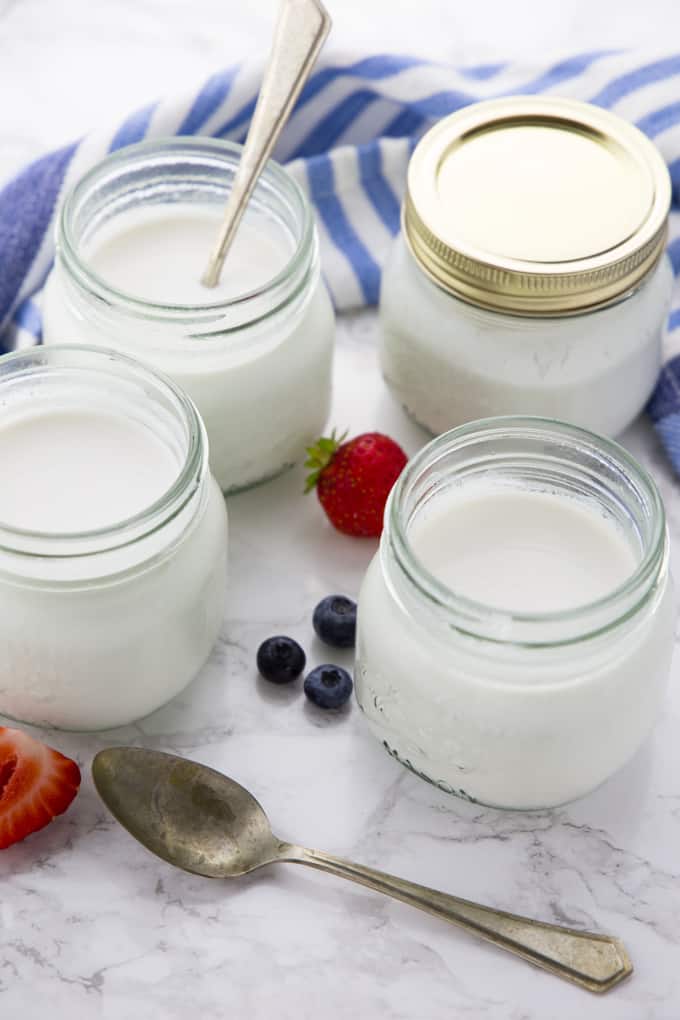
7. Step: Store them in the fridge for at least 24 hours. The longer you store the yogurt the thicker it will get.
8. Step: Serve the coconut yogurt with fresh berries or granola.
Recipe Notes:
- Please make sure you follow the recipe. I hate for you to wait for all this time and then not have a satisfying result.
- You need an Instant Pot with a yogurt function for this recipe. I used the Instant Pot Duo 6 Quart. It will not work without the yogurt program.
- You need a total of 50 billion active cells for this homemade vegan yogurt. You can also use the content of several capsules. Just make sure you have a total of 50 billion.
- Agar agar powder serves as a thickener for this vegan yogurt. I usually use 1 teaspoon of powdered agar agar. You could replace it with 1 tablespoon of agar agar flakes.
- Sometimes the yogurt separates a bit when being stored in the fridge, so stir it with a spoon before eating it.
FAQs:
Where Can I Find Vegan Probiotics?
Many drug stores carry vegan probiotics. However, not all probiotic capsules you find in the drug store are vegan. The cultures used for these priobiotics are usually grown on dairy products.
When searching for a vegan probiotic, make sure to pick a brand that is labeled “vegan” and not just “non-dairy”. “Non-dairy” does only mean that this products does not contain any dairy. It doesn’t tell you much about the process of making these probiotic capsules. It could still involve dairy.
Here’s a helpful list of vegan probiotic capsules. You could also order them online.
Where Can I Find Agar Agar?
I usually buy it online on Amazon or at our local Asian market, where it’s really cheap. I’ve also seen it a natural food stores, but it’s much more expensive there.
You might also want to check the baking aisle at your local grocery store.
How Long Does The Yogurt Last?
Stored in airtight containers or single glass jars in the refrigerator, the vegan yogurt lasts up to 10 days.
My Yogurt Has the Smell and Aftertaste of Past Meals. What Can I Do?
Make sure to clean the inner pot of your instant pot with hot water before making your yogurt. I typically only cook savory meals in there and leftover aromas carry over easily.
When I made my first Instant Pot yogurt it smelled and tasted like curry so badly I had to throw it away. So frustrating!
I now got a separate sealing ring that I use for sweet recipes and yogurt. If you make a lot of savory recipes in your Instant Pot, I suggest you do the same.
Related Recipes:
- Vegan Cream Cheese
- Vegan Mozzarella Cheese
- 30 Stunning Vegan Cheese Recipes
- Vegan Nacho Cheese
- The Cheesiest Vegan Cheese Sauce
I Love To Hear From You!
I hope you like this vegan yogurt as much as we do around here.
If you give it a try, I’d love to know what you think about them. Just leave me a comment and a star rating below. Your comments really make my day!
You like my recipes and want to see more? Then follow me on Facebook, Instagram, or Pinterest!
Sina

Vegan Yogurt
Ingredients
- 2 cans full fat canned coconut milk
- vegan probiotic capsules totaling 50 billion active cells (use several capsules if one of your capsule has less than 50 billions. Just make sure you have a total of 50 billion)
- 1 teaspoon agar agar powder (it serves as a thickener)
Instructions
- Pour two cans of full fat canned coconut milk into your instant pot. Make sure to use an Instant Pot with a yogurt function. I used the Instant Pot Duo 6 Quart for my coconut yogurt.
- Carefully open a vegan probiotic capsule and pour its content into the Instant Pot. You should have a total of 50 billion active cells. If you have probiotic capsules with less active cells, just use several capsules to reach 50 billion. Only add the content of the capsule to the coconut milk, not the whole capsule. Also add the agar agar at this point.
- Stir with a whisk or spoon until well combined.
- Press the "Yogurt" button on your Instant Pot and set it to 24 hours using the "+" and "-" buttons. Then let the Instant Pot do its thing.
- After 24 hours open the Instant Pot. Please note that the yogurt will still be pretty thin and runny. Don't worry, that's normal. It will get considerably thicker when it's cooled for at least another 24 hours in the fridge.
- After opening the lid, transfer the coconut yogurt into small glass jars or plastic containers.
- Store them in the fridge for at least 24 hours. The longer you store the yogurt the thicker it will get.
- Serve the coconut yogurt with fresh berries or granola.
Notes
- Please make sure you follow the recipe. I hate for you to wait for all this time and then not have a satisfying result.
- You need an Instant Pot with a yogurt function for this recipe. I used the Instant Pot Duo 6 Quart. It will not work without the yogurt program.
- You need a total of 50 billion active cells for this homemade vegan yogurt. You can also use the content of several capsules. Just make sure you have a total of 50 billion.
- Agar agar powder serves as a thickener for this vegan yogurt. I usually use 1 teaspoon of powdered agar agar. You could replace it with 1 tablespoon of agar agar flakes.
- Sometimes the yogurt separates a bit when being stored in the fridge, so stir it with a spoon before eating it.
Nutrition


Regina Grier
I made this about a year ago. It never thickened. However, the flavor was wonderful! This time I’ll double the agar agar. I plan to add fresh vanilla beans to it as well. Is there a way to add fiber to the yogurt? I have to watch my carbs, as I’m diabetic and increasing the fiber would be great.
Illume
Do you know if the probiotic capsules contain iodine? I would like to make this without the agar agar for when I need to do the ThyCa diet for thyroid cancer screenings, but the manufacturers won’t answer me asking, as they won’t authorize using their capsules to make yogurt.
Tiffany
Hello! Thanks for the recipe. It tastes really good! But, mine has been in the fridge for almost a day and it’s still runny. Any ideas on what I did wrong and how I can thicken it up? Thanks!
Samantha
I’m very excited to try this. Just making sure if I were to double this recipe I’d have to double the amount of probiotics? So 100 billion units? Thanks again.
Sina
Hi Samantha,
Yes, you should double the amount of probiotics in this case.
Teresa
Any thoughts about adding flavoring like vanilla or straining it further while cooking in fridge to make a thicker “Greek style” yogurt?
Sina
Hi Teresa,
I haven’t tried adding any kind of flavor yet. But I think you could add vanilla extract after cooking the yogurt. For a Greek style yogurt, I’d add more agar agar powder. Maybe 1 two 1 1/2 teaspoons. Let me know if you give it a try.
Bonnie Hanson
Question: Have you experimented with making a larger quantity? If I wanted to double this recipe by using 4 cans of full fat coconut milk, should I also increase the probiotic capsules or will 50 billion handle the larger quantity of coconut milk?
Sina
Hi Bonnie,
I would double the probiotics in this case.
Tania
Mine separated also and didn’t thicken at all. I followed directions exactly. Any idea what went wrong . The flavor is good though.
Sina
Hi Tania,
Oh I’m sorry it didn’t thicken properly. How long did you store in the fridge? It gets thicker the longer you store it in the fridge. I usually store mine in the fridge for two days before eating it. I also experimented a bit again and I now recommend adding agar agar powder to the yogurt to make it thicker. I works really well. :-)
Kate
Hi Sina! Thank you for sharing this simple recipe. After I refrigerated my yogurt, it began to separate. It has a layer of coconut oil on top, yogurt in middle, and liquid in bottom. Did this happen to yours? Did you stir it or strain it?
Sina
Hi Kate, Oh, okay. No, this didn’t happen to mine. At least not like you’re describing. I usually stir mine before eating, so it wasn’t a problem. Does stirring help with yours?
Deb Schaefer
So excited to try this recipe. I just wanted to verify that I don’t activate the “boil” function on my Instapot after I press the “yogurt” button. Other recipes say you have to boil the coconut milk first. Thanks!!
Sina
Hi Deb,
No, I haven’t used the boil function. I just let the yogurt program do its work. :-) Don’t worry if the yogurt seems pretty thin and runny at first, it will thicken up considerably when it’s in the fridge.
Let me know how you liked the recipe. :-)
D
Could you put the yogurt in the jars initially and avoid that step at the end?
Sina
You mean putting them in jars and then put them in the Instant Pot for the 18 hours? No, I wouldn’t recommend that. But if you want to make it easier, you can just put all of the yogurt in a big container after the 18 hours in the Instant Pot and store it in the fridge.
Cheryl
I do this every time and it works perfectly. I also have used a silicone container and it was fine as well!
Sarah Kinnear
Is it 19 or 18 hours – you have both in your recipe above. Thanks!
Sina
Hi Sarah,
Sorry for the confusion! It’s 18 hours as stated in the recipe instructions. The 19 hours in the recipe notes was a typo. Hope you like it. :-)
Nicola Johns
Presumably this recipe should work in any yogurt maker, not just an instant pot?
Sina
Hi Nicola,
I’ve only tried it in the Instant Pot so far, but I don’t see why not. :-)
Let me know if you give it a try!